domingo, março 31, 2019

Strict NAT pfSense PS4 and XBOX fix

Hi guys, out of popular demand I give you a quick tutorial on how to fix the Strict NAT or NAT Type 3 problem on your PS4 or XBOX Gaming Console.I came across this question several times and people are recommending hilariously complicated solutions where you just really need to create an Outbound NAT rule within a few seconds.


Creating an Outbound NAT Rule

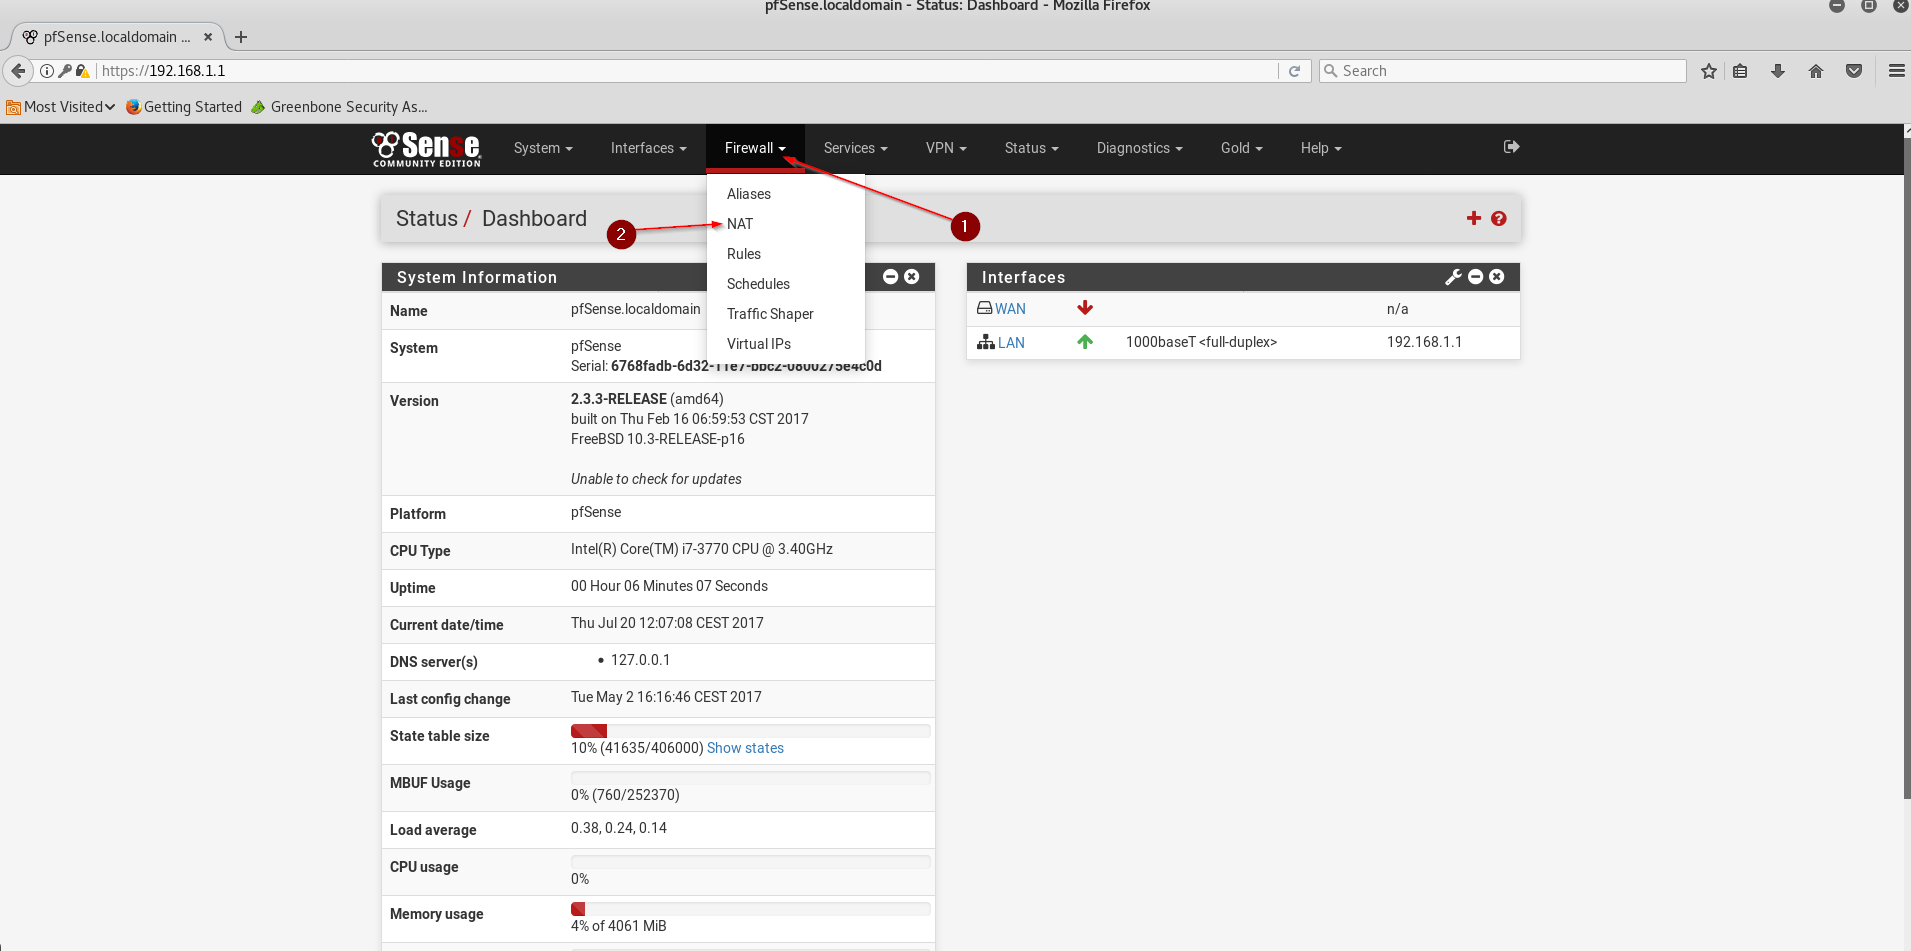
Log in to your pfSense Web Interface and Navigate to Firewall / NAT.

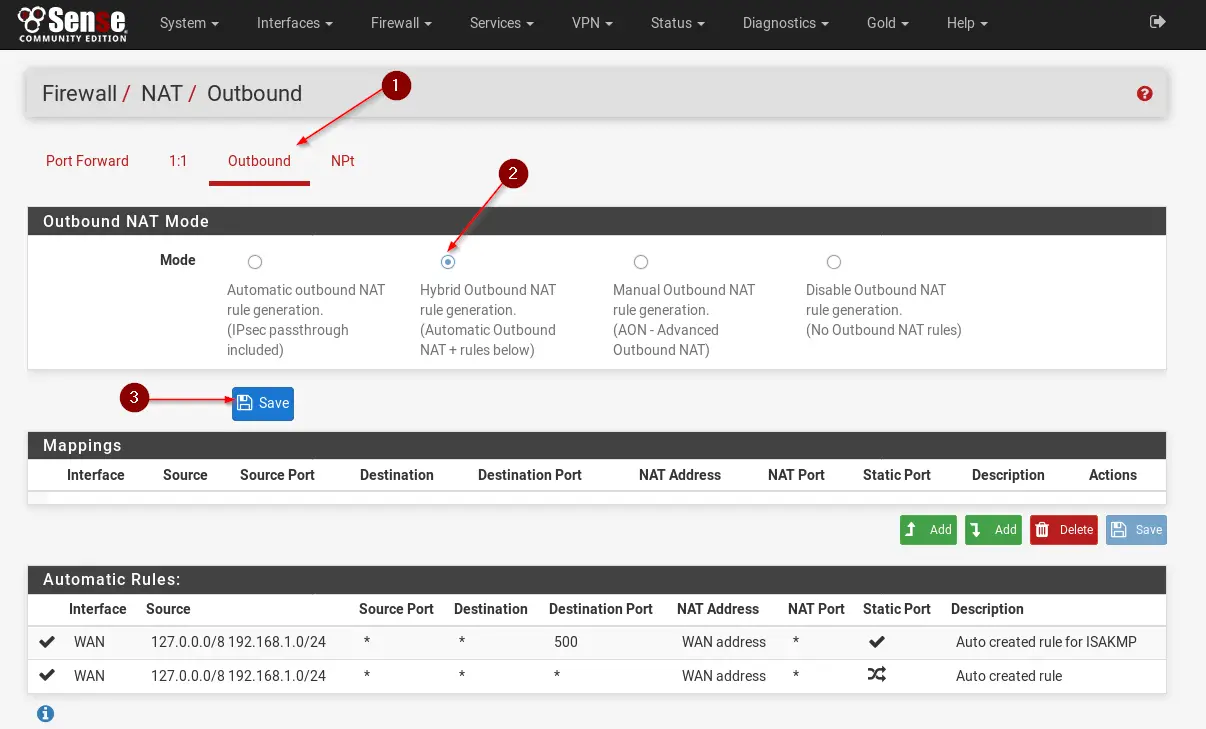
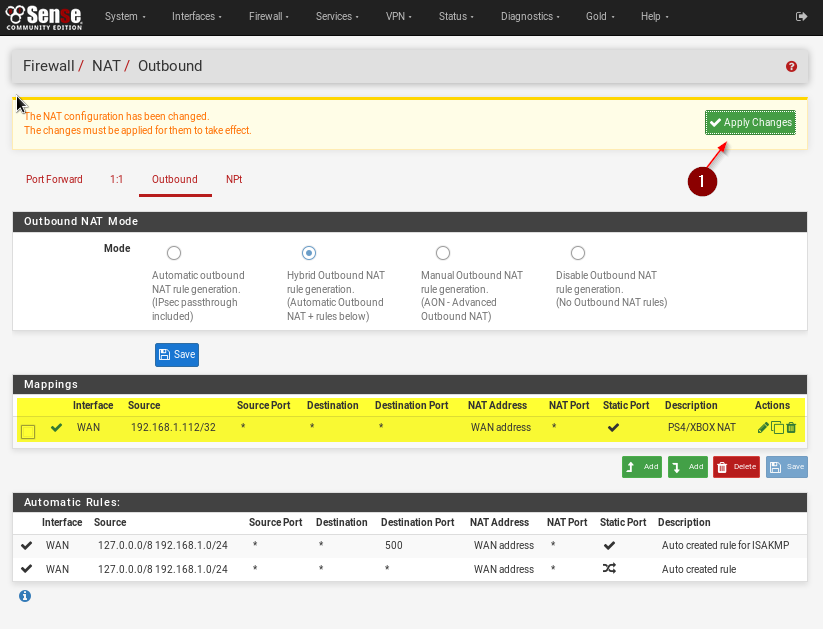
Navigate to Outbound and change the Outbound NAT Mode to Hybrid outbound NAT Rule Generation and click on Save.

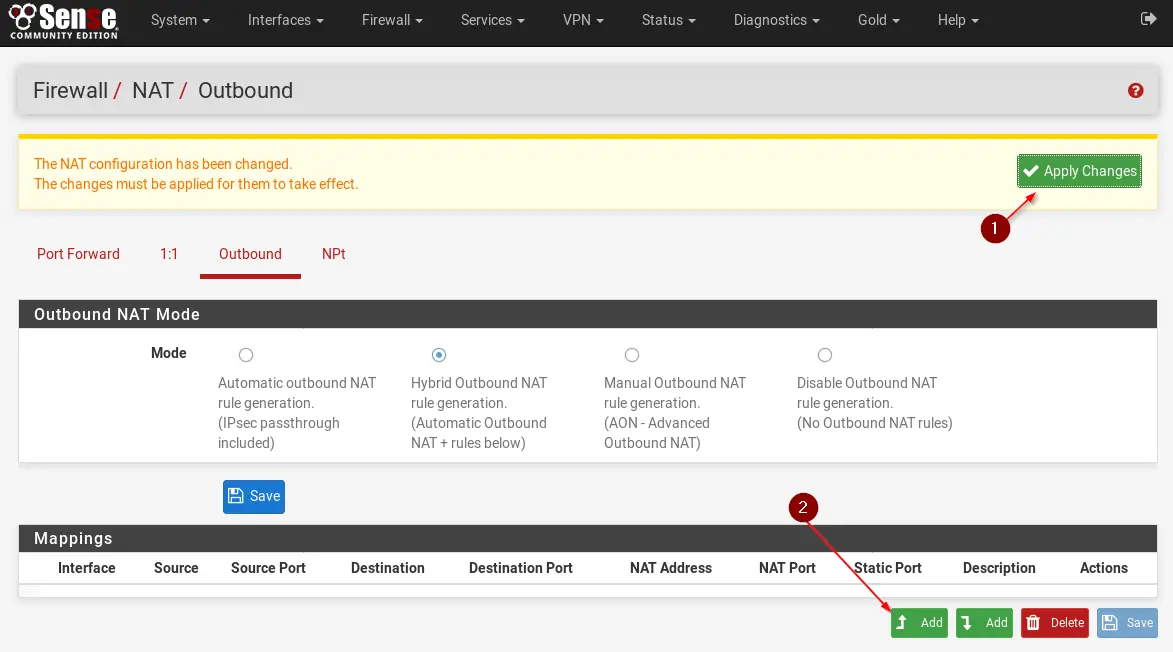
Don’t forget to click on Apply Changes and click on Add to Add a new Rule next.


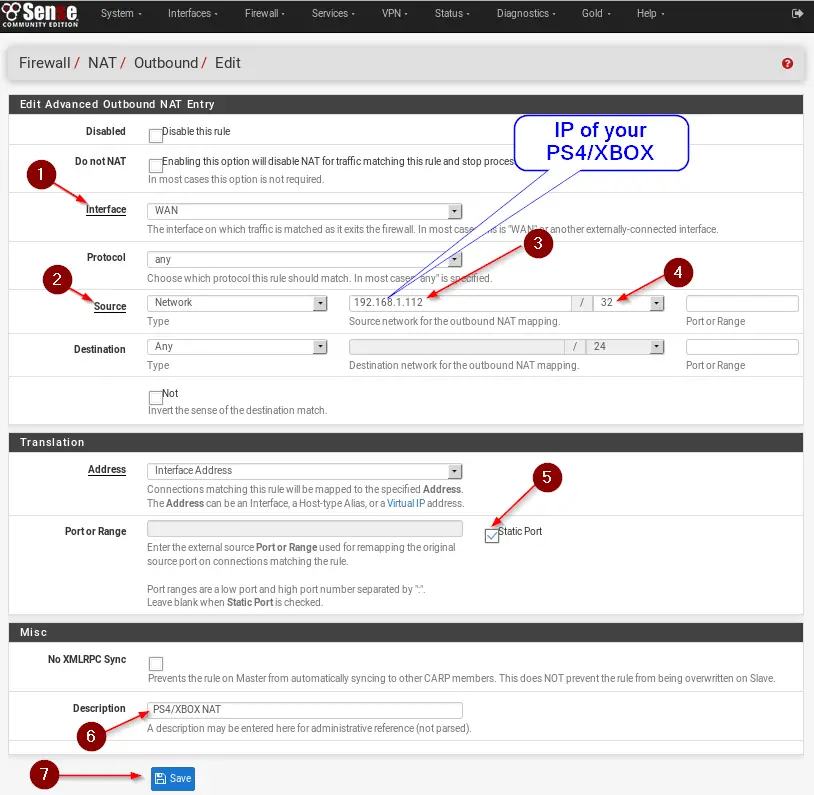
Adjust the rule like in the example below. The Source IP is the IP of your Gaming Console. You can see that under Status / DHCP leases or ideally give your console a static IP Address. You can do that over your pfSense DHCP Server. Also make sure you select 32 as your subnet mask, which means that this rule ONLY applies to this one IP Address or your Gaming Console.
Make sure you tick Static Port. Give it a Description and hit Save.

Now hit Apply Changes again and you are good.

You should now have NAT Type 2 on your console and be able to use Voice Communication and play with your friends.
sábado, março 30, 2019

How to keep X11 display after su or sudo

https://blog.mobatek.net/post/how-to-keep-X11-display-after-su-or-sudo/

You can also use a single (magic) command in order to achieve this!

For instance, here is a simple scenario:
  • I start a SSH session to remote server “Server1” with user “john”
  • In this session, I perform a “su -” command in order to become “root”
  • If I run “xclock”, the following error occurs:
MobaXterm X11 proxy: Authorisation not recognised
Error: Can’t open display: localhost:10.0
I just have to execute the following command in order to retrieve my display and make “xclock” work:
xauth add $(xauth -f ~john/.Xauthority list|tail -1)

We hope this will help you if you need to have a working X11 display through SSH after becoming root.
Get your $DISPLAY and export it if you changed to root user. Check if they are the same, it has to be!

segunda-feira, março 04, 2019

Ubnt unifi lost password

Some commands I used, to catch user and to "add" when needed.

 very important, find your backup, you may needed, even after you reset the password.
/var/lib/unifi/backup/autobackup/*.unf

mkpasswd -m sha-512
Password:
$6$9Ter1EZ9$lSt6/tkoPguHqsDK0mXmUsZ1WE2qCM4m9AQ.x9/eVNJxws.hAxt2Pe8oA9TFB7LPBgzaHBcAfKFoLpRQlpBiX1


password (word password in hash...)
mongo --port 27117 ace --eval 'db.admin.update( { "name" : "admin" }, { $set : { "x_shadow" : "$6$9Ter1EZ9$lSt6/tkoPguHqsDK0mXmUsZ1WE2qCM4m9AQ.x9/eVNJxws.hAxt2Pe8oA9TFB7LPBgzaHBcAfKFoLpRQlpBiX1" } } )'


https://community.ubnt.com/t5/UniFi-Wireless/Controller-not-letting-me-change-admin-password/td-p/1560207/page/2

d = { "name" : "ubnt", "lang" : "en_US", "x_password" : "ubnt" , "time_created" : "", "last_site_name" : "default"}
db.admin.insert ( d )

Execute 'mongod --dbpath /usr/lib/unifi/data/db --repair' (this broke my install)


List users admin's

mongo --port 27117 ace --eval "db.admin.find().forEach(printjson);"

Run windows programs and apps on Linux with Wine

https://wiki.winehq.org/Debian

Debian...

Wine enables Linux, Mac, FreeBSD, and Solaris users to run Windows applications without a copy of Microsoft Windows. Wine is free software under constant development. Other platforms may benefit as well.

Debian Sources List Generator

https://debgen.simplylinux.ch/


This generate lines for repository file on apt

/etc/apt/sources.list

sábado, março 02, 2019

Burn iso to usb

Softwares that can be used


Make usb flash bootable
Usb Boot

1) Rufus (windows only)
https://rufus.ie/

2)balenaEtcher (Mac, Windows, Linux)
https://www.balena.io/etcher/